Revamp a border – 11 tips on how to turn scrappy into sensational
Spring and autumn are the best times to completely revamp a border.
So I’m going to renovate the main herbaceous border in my garden. It’s where I focus all the garden colour, so it’s a key part of the garden.
But as gaps appear, I pop a plant in here and there. It’s slowly losing coherence. And the record-breaking heatwave this year really showed up its weaknesses.
The day lilies, for example, are thugs, often out-competing other plants in the border. But in the heat, they simply shrivelled up. They must go. And other plants don’t look as good as they did.
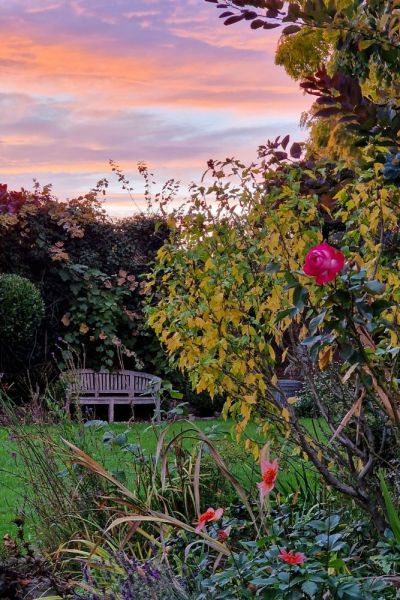
There are patches of good colour in the border, but it’s not coherent and too many plants are past their best.
Every so often any border needs a really good assessment, and probably a complete revamp. So I’ve picked out the top advice on how to rejuvenate a border from the amazing head gardeners and garden designers I’ve interviewed here over the years.
Note: Think of the preparation work you need to do when you paint a room in your home! DIY books and magazines always stress that good preparation is the key to success when you paint an interior. It’s the same when you revamp a border.
How to revamp a border checklist
- Revamp your border in autumn (fall) or spring to help plants establish well. There are also often good discounts on plants in autumn.
- Clear the border completely, except for shrubs or trees you want to keep.
- Tackle perennial weeds by picking their roots out of the soil.
- Pot up the plants you want to keep. You may want to re-plant them in the same border, somewhere else in the garden, give away or discard.
- Add 3″-4″ layer of garden compost or well rotted manure
- Measure the border to assess how many plants you need.
- Decide on a theme (eg colour or style) to suit your climate and soil.
- Do your research before buying plants!
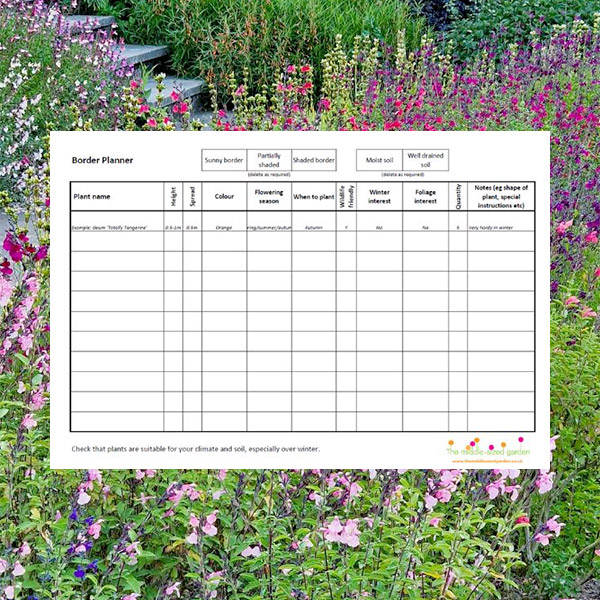
- List the plants for height, spread, colour and flowering season (see our free downloadable border planning checklist)
- The key to a successful border is repetition – repeat the same plant or group of plants at intervals
- Limit varieties – you need more plants of a few varieties not one of everything
When to revamp a border
Most professional gardeners advise you to plant your shrubs and many perennials in autumn (fall) and spring. In the UK, we’re currently getting dry weather in spring, which makes autumn the best choice.
However, if plants are borderline tender and struggle to survive your winters, then plant them in spring. This gives them a better chance to establish before winter comes. In the UK, that includes salvias, dahlias and cannas.

You can plant many perennials in autumn, but leave borderline tender plants, such as cannas, dahlias and salvias until late spring. This is Canna ‘Wyoming.’
Don’t plant in summer or winter. In summer, the weather is often too hot and dry. And in winter, the ground may be frozen or very wet.
The other reason why autumn is a good choice to renovate a border is that you can find lots of good bargains in plant shops. It’s expensive to buy lots of plants at once. So you can cut the costs by up to 50% if you focus your buying in autumn when there are lots of end-of-season bargains around.
If you just want to add a few plants to your border rather than revamp it completely, then see Henry Macaulay’s advice on filling gaps in your border here.
Clear your border properly first
Former garden designer, Jane Beedle, says she’s often renovated borders for clients in the past. ‘When you revamp a border, the most important thing is to clear it completely,’ she said. ‘Put plants you want to keep in pots for the time being. But it is important to start with as much of a clean slate as you can.’
Jane completely renovated her whole garden, turning a small backyard into a beautiful contemporary space on a tight budget.
Clearing everything away sounds easy, but it’s surprisingly difficult to do – both physically and psychologically! I told Jane I wanted to leave in persicaria, asters and echinops, because they’re currently doing well. And there are around 5 rose bushes that are well established, as well as some trees, which offer fabulous leaf colour and bark interest.
‘Leave established trees and shrubs if you intend to keep them,’ she said. ‘But dig up everything else.’
So I will dig up and replant the persicarias, asters and echinops, but probably in slightly different places.
It’s also an opportunity to get rid of plants which have never been brilliant but have never quite died either. Some plants in my garden were even planted by my predecessor and have been in the border for decades.
It’s time to be tough. Dig them up and plant them elsewhere, compost them or give them away!
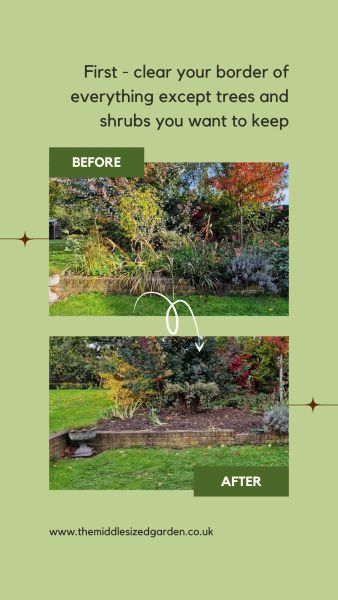
This is the first section of border to be cleared. We took around 9 hours to dig up established plants, pick out the roots of perennial weeds and add a layer of mulch. This area is around 3m/15ft x 2m/10ft.
When you revamp a border, clear perennial weeds
When you’re digging out your border plants, sift carefully through the roots and soil to pick out the roots of perennial garden weeds.
This is a tip from garden designer, Posy Gentles: ‘It’s a good opportunity to get on top of things like ground elder or bindweed,’ she says.
It’s almost impossible to get every scrap of root out, but you can really knock the perennial weeds back. Then it’s much easier to deal with the few that do pop up in spring.
If you’re prepared to leave your border for a season or so, you could cover it with cardboard to exclude light. That’s the no dig way of clearing perennial weeds. You can find out more in No Dig for Flower Borders. But picking through it manually is just as effective and means you can plant immediately rather than leaving the border covered for a summer.
Mulch before re-planting your border
Whether you decide to revamp a border in spring or autumn, it’s important to mulch it before re-planting.
Add a 3″-4″ layer of garden compost, mushroom compost or well rotted manure to the whole border. You don’t need to dig it in, as the worms and micro-organisms will do that for you. It’ll add lots of nutrition.
I usually add mulch to the border at least once a year, but we normally have to work around existing plants. When you renovate a border, it’s a wonderful opportunity to get a really good layer all over the soil.
But it does add to the cost. To get the 3″-4″ layer, I used 6 x 50 litres of garden manure just on one 3m (10ft) x 3m section of the border. That’s about one third of the whole border, so that will be 18+ sacks of manure. You can often save money by having it delivered in bulk. Search ‘garden manure near me.’
One thing to be aware of when buying manure is that some farmers spray their fields with a selective weedkiller containing aminopyralids. This is safe for animals to eat, but it continues to kill plants even once it has been through their digestive system. It’s passed on through their manure and doesn’t break down properly while the manure is rotting. Research suggests it does break down after a few months on your borders. But if you plant immediately into manure that has been contaminated with aminopyralids, then it could kill some of your plants.
Garden compost, mushroom compost and organic manure don’t have this problem.
All this means that renovating a border can take a surprising amount of time, effort and money. But it’s worth it!
Pot up the plants you want to keep
You will probably dig up some plants you want to keep. So pot them up or plant them elsewhere.
If plants are borderline hardy, don’t replant them immediately. Keep them somewhere frost-free until spring. I don’t usually dig up my dahlias, but I will this year. And, although it’s taken the cannas a few years to get established, I am going to dig them up, too. So far, they have survived four years in the ground over winter, but I am not going to re-plant them immediately. I’m going to store them over winter and replant after the first frosts in spring.
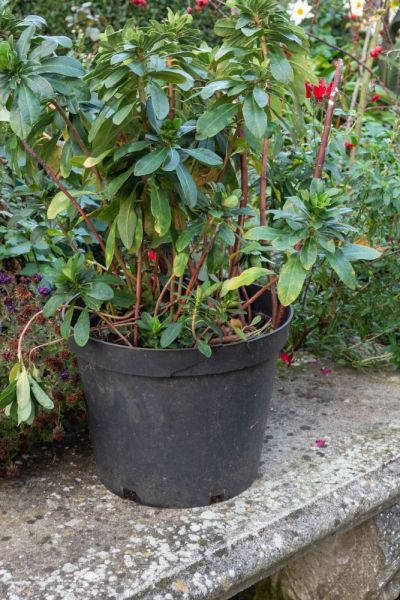
Put the plants you want to keep into pots until you plant up the border. If they are tender, keep them in a cool, frost-free place over winter and plant in spring.
Measure the border and think of a theme
Even if you’re not going to draw up a scale plan of your border, it’s worth measuring it, so you can get some idea of how many plants you’ll need.
Then decide on a colour theme or another way of focusing your plant buying. If you have a particular garden style, such as ‘English country’ or ‘cottage garden’, then this is a good start. (See this post for 12 top garden styles.)
You might want a classic herbaceous border, for example, in which case check What You Need To Know to Create An Outstanding Perennial Border.
Or perhaps you’d like to try the new perennials trend of naturalistic planting, in which case see Michael McCoy’s advice on Naturalistic Planting Design.
Or pick a colour theme or combination. My garden has red brick walls and a distinctive red-leafed ‘Cotinus coggyria’ Grace. So my colour theme will start with red. I think red/purple/gold (orange or yellow) could be a good one.

I do like the colour theme of red, pink, purple and orange. So I’ll keep it but try to make it less scrappy – this border really only looks good from this angle.
Garden writer and plant seller Sarah Raven is brilliant at creating colourful borders. She says that you need to think about the use of white in a border. If the colours you’ve chosen have lots of white in them, such as pastels, then white flowers will look good. But if you’re going for rich or bold colours – which I am – then adding white flowers could make them look dull.
There’s more about choosing and combining plant colours in How Friends and Lovers Improve Your Summer Garden Colour.
Two excellent books on border colour are Sarah Raven’s The Bold & Brilliant Garden and Colour for Adventurous Gardeners by Christopher Lloyd. They have detailed plant information and inspiring colour combinations. I’ve returned to them time and time again.
Note that links to Amazon are affiliate, see disclosure.
Do your research before buying plants!
It is essential to make a list of plants for your border before you go out shopping. Many plants don’t look good when they’re for sale in garden centres, especially at the end of the gardening year. And if you just pick up plants you like when you see them, you won’t get a good balance of flowering over the whole year.
And most importantly, the information on plant labels is quite generic. All the plants for sale in one of my local plant nurseries have a label that says ‘Plant in moist, fertile soil and water well until established.’ There was limited information that would help me to choose, say, drought tolerant plants or ones that would be happy in wetter soils. Larger nurseries and garden centres buy their plants in from big growers, hence the generic labelling. And smaller nurseries often don’t have time to write up special instructions.
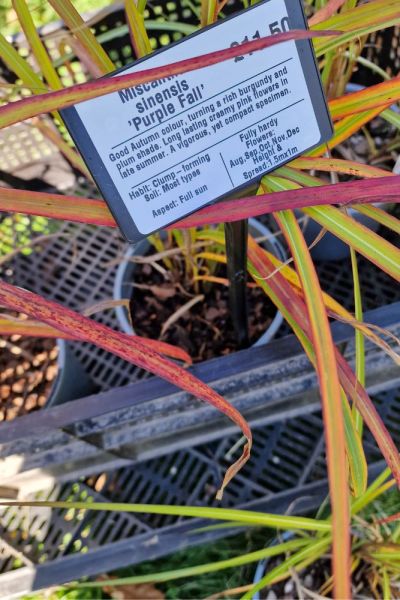
Not many labels have this much good information on the label! Seen at the Great Dixter Plant Fair, which is a wonderful place for buying plants.
Your starting point is to check whether your border is sunny, shady or partially shaded. It’s important to choose plants that are appropriate.
But there are other factors to consider too. Do you want plants for a drought-prone garden, acid-loving plants or plants that cope well with windy gardens? If you have local independent nurseries near you, then you should be able to ask the staff and get their advice on which plants are best for your situation.
And it’s important to think about the height, spread, flower and foliage colour, season of flowering etc on each plant you’re considering buying. I found that it was much easier to spot where there were gaps in flowering times or whether I had enough of a particular colour if I listed the plants I was interested in, filling in the details in columns on a grid.
So I’ve devised a Border Planning Checklist, which you can download for free here.
(You’ll also be invited to ‘confirm your subscription’ to the Middlesized Garden for a free weekly email with gardening tips, ideas and inspiration. But if you don’t want the weekly email (or you’re already a subscriber), don’t click ‘confirm subscription.’ You’ll still get the free downloadable checklist, but not the weekly email.)
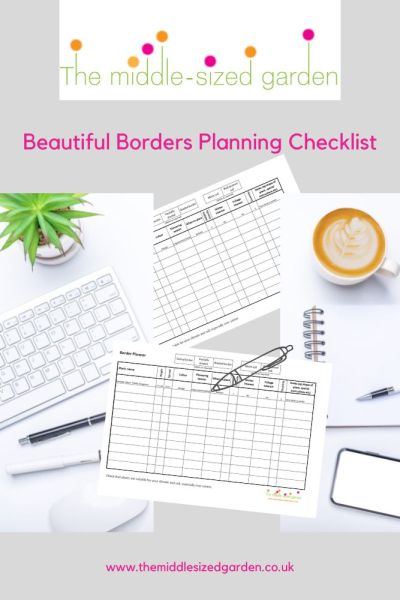
I found it really useful to list plant characteristics in columns. It was really easy to spot where I didn’t have enough winter interest, for example, or where I had too much of a particular colour.
Buy more of each plant but limit the varieties of plant!
Gardening writer Tom Brown, who is also head gardener at West Dean Gardens in Sussex, says that it’s important to make a list of the plants you’d like in your border, then to edit the list by cutting the number of varieties.
In 12 Essential tips to Create a Stunning Border he says that a border can be a competitive place for plants. Some plants get overwhelmed by their neighbours. But if you have a good sized clump – 5,7,9 or 11 plants rather than one, two or three – then it doesn’t matter if one or two plants on the edge of the clump don’t make it. You’ll still make an impact with the group as a whole.
Tom also plants his groups in a ‘tadpole’ shape, with a main clump curving up and round to slot into the next tadpole shape.
And it’s better to repeat clumps of plants rather than have lots of different plants around the border in ones and twos.
You’ll also need to think about whether you want a traditional border with the heights of plants going from the tallest at the back and the smallest at the front. In How to Create an Outstanding Perennial Border, Steve Edney suggests you go up around one third in height from front to back.
Or you may prefer a new perennials style border, like the one designed by Michael McCoy in Naturalistic Planting Design – How to Get It Right In Your Garden. In naturalistic planting, heights are less important because the effect comes from contrasting plant shapes and foliage colour rather than focusing on flowering.
There are more practical tips about choosing plants when you revamp a border in How to Plan a Border Like a Pro and more advice on choosing perennials in Perennials Made Simple.
Happy planting!
How far apart to plant plants
Once you’ve bought your plants, it’s time to plant them! Plants need enough space between them to grow well. But you may also want a full-looking border as soon as possible.
Look at the ‘spread’ of the plant. It should be on the label, or research it on the internet. The spread is how much space the plant will occupy in the soil when it’s mature.
So you can plant a plant with a ’50cm/20″ spread’ 50cm/20″ away from the next plant. However, many gardening authorities say you can reduce this by around 10% to cover the border better.
And some people plant their perennials around 30cm/12″. If you do this, you may have to thin the border out as the plants mature, but it should give you good coverage early on.
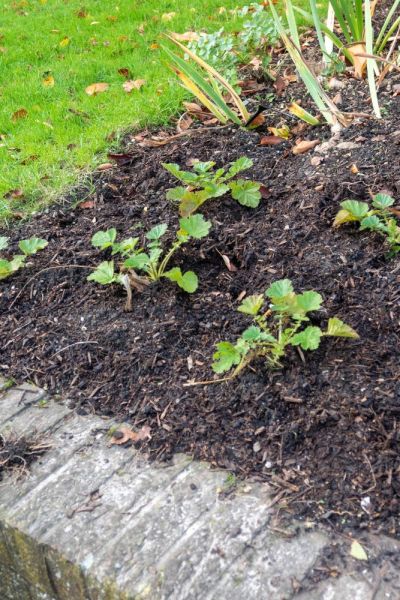
These Geum ‘Totally Tangerine’ are planted around 15″ apart. The ultimate spread of each plant will be around 50cm/20″, so I am packing them quite tightly. I may have to take a few plants out when they get bigger.
Pin to remember how to revamp a border
And do join us for a free weekly email with more gardening tips, ideas and inspiration.






I just discovered your website and videos, and have been binging. I purchased a new home in June, and unfortunately the yard has been left to ruin. The back yard has no grass and is just mud and dirt, with no plants what so ever. The front yard has two over grown cedar trees and two bushes of some sort, and nothing else. Needless to say I have a ton of work ahead of me and I’m a bit overwhelmed by the idea of it. I’m trying to plan everything out and am finding your videos and posts helpful. Thank you for all of the great information, though I’m still overwhelmed and not sure where to start yet.
Thank you! And that sounds quite a challenge. Take your time to think about what you’d really like to see and do in your garden. If you haven’t seen this interview on the basics of garden design, this may help: /how-to-design-a-garden/ Good luck! I think you’ll find that nature will be happy to help you, and to start growing as soon as you plant anything.
I so enjoy your posts! Will you elaborate on the tadpole shape planting? Horizontal or vertical? I want my plants to flow into each other and am having a hard time with that.
I’m not quite sure what you mean by ‘horizontal or vertical’, but the tadpole shape is like an irregular oval shape in the ground, with an extra plant near the top and/or bottom of the oval. The shaping isn’t too exact – it’s more of a clump than a shape. I’d suggest setting out the pots of plants on the soil before deciding exactly where to plant them, and don’t worry about it too much – the advantage of planting 5,7 or 9 plants is that if one or two can’t survive, the others will still be there. The main point, I think, is not to plant them in a straight line, but to plant them in a roughly round or oval grouping, so that some are further back from the edge of the border than others. I hope that helps.
Great advice & pictures. I like how you’re taking me along on the renovation. I’ll look forward to updates!
Thank you!
Such a lot of very useful information, thanks
Thank you!